Lo3 D1 Controlling the shutter speed and using a tripod
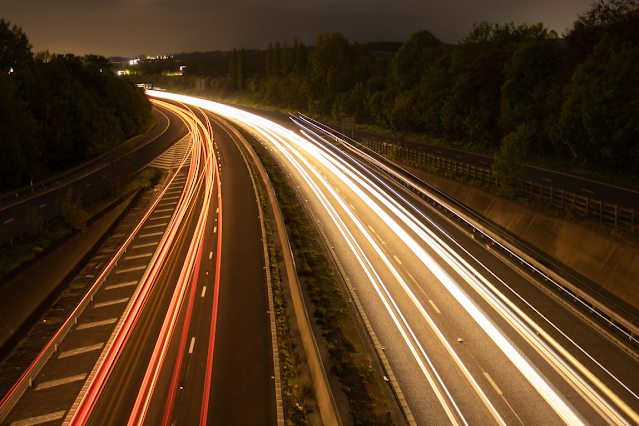
This picture was taken at a bridge on top of the Warms worth motorway. I set the image up using a tripod and stood slightly in the middle of the bridge, hoping to incorporate both sides of the road. I controlled the shutter speed and set it to a 10 second shot. I also tried to take some using a 5 second shot, and a 30 second shot. However, this shot turned out the best and showed more light trails from the cars. I like this shot as it shows how I am able to edit the shutter speed to create a really interesting shot that is pleasing and balanced. The way the lights and road curve lead the viewer into the rest of the image. The foreground of the image is mainly in focus, that is because the bright roads in the image stand out to the viewer. The combination of the leading lines rule and the bright colours contrasted against the otherwise dark image lead the viewer into the rest of the image. This makes it more appealing to the viewer as the image flows better into the background.
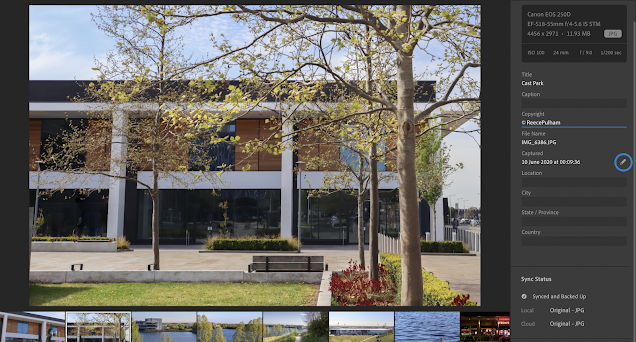
As you can see this video shows how I was able to change both the shutter speed and aperture within the camera. I was able to use this when taking all three of these photos, as I knew how to access these settings and capture images that utilises these effects. In all three of these images you can see how I've utilised these settings to create a shot with a unique perspective or depth of field. Which makes the images more interesting and appealing to the viewer, as the image would flow better for them.
This picture was taken similarly to the last photo. I angled the tripod specifically so that the church would be tilted within the shot, and off centre by a little bit. This was because I was taking advantage of the Golden circle rule, and the rule of thirds in photography. I focused the camera on the church specifically, and zoomed in slightly so that I could capture a closer shot of the church. I took multiple different versions of the shot all with different shutter speed settings. However, this picture (which was captured for 30 seconds) appeared to be the most appealing. In retrospect, I wish that I had chosen a better angle, as I don't think the starburst effect from the lamppost does not look good in the final image. To fix this I just cropped the image and focused more on the tower of the church, and the detail found within it. To capture this image, I used a tripod and faced it towards the church. I did this to capture a very sharp and focused shot as I was taking a 30 second image. I had tried before to take images at night without a tripod and they were very blurry and unfocussed. So I used a tripod to keep the camera still, which created a very sharp and crisp image that looked pleasing and clean.
This is image shows how I was able to use both shutter speed, and aperture when taking images. The focal point of the image is the duck and the water surrounding him. The water in the background, and the piece of wood in the foreground, are out of focus, due to how I edited my aperture when taking the shot. Furthermore, to acquire this shot, I used a faster shutter speed which allowed me to capture the image, without it being overexposed. The aperture of this image is f/11, I used this aperture as it allowed me to capture a scene with as much depth of field as needed. This type of photography can be used for macro photography or landscape photography. I have used it to capture the flowing water and the duck that is also in the image. I have used this style very unconventionally as it allowed me to capture the water that looked very smooth and sharp, it almost looks like an oil painting.
This image shows how I was able to use aperture, and the ISO on the camera to capture a very sharp and dark image, that utilises the neon lighting as a light source. The ISO of this image is 100, which is very low. This means that the image captured on the camera will be very dark and not capture as much light. I did this as the bright neon lights could have ruined the image or become starburst if the ISO was too high. I wanted to make the neon lights in the image stand out to the viewer, while not becoming too bright, and by lowering the ISO I managed to capture this. Also, the shutter speed of the image is 2.5 seconds. This is why I was scared of creating starbursts with the neon signs, as the camera would have captured a lot more light than if I used a shorter shutter speed. I did not use a tripod for this image, instead I rested the camera on my car which resulted in the reflections that are seen at the bottom. This also utilises depth of field as the car roof is out of focus, while the TGI is very sharp and crisp.
Evaluation of techniques:
Overall, each technique allowed me to capture a sharp image that showed how I had learnt expert photography skills, that have allowed me to create pleasing images that appeal to the viewer. By using these techniques in different scenarios, I learnt that specific techniques are optimised for specific scenarios and can be used to create a very sharp and outstanding image. For example: While at night, I found that decreasing the shutter speed of the camera allowed me to capture a very bright and sharp image. I then proceeded to use this method for every night shot, adjusting the shutter speed slightly, as to find the optimal settings that would create a perfect picture. Along with this, editing the ISO of the camera made the TGI Friday image not too bright, as by editing the shutter speed I could've created starburst effects all over the screen. By changing the ISO, it allowed the neon lights to be bright without causing a starburst effect. When taking close up images of plantlike or animals, I made sure to apply the aperture to f/11 as it is the optimised aperture setting for these type of shots. You can see how I have utilised this on the image of the duck, as it is highly in focus and very sharp. After evaluating the techniques that I had used to capture each image, my personal favourite was adjusting the shutter speed while taking night shots. I enjoyed this technique as it allowed me to capture different variations of the same shot, and I used it to its full capabilities when shooting the TGI image.


Comments
Post a Comment